Monday, November 30, 2009

Faux Crocodile Clutch


I meant to post this a while back and forgot, so here it is for those of you who had been waiting... sorry about that!


I saw this technique at the Seattle regional I attended last year and Fredrique one of my stamping friends made an adorable clutch with it for a swap. I loved it so much I used it for a workshop and people just loved it. I made the clutch a little taller and in passion pink but the technique works for any color cardstock. It will come out the color of whatever color cardstock you use so you can go hog wild with any color you desire!


Here is Fredrique's celery version. Isn't it sweet?


This is what the inside looks like open.


These are the piece you need for the clutch. I figured out that the whole thing takes one 81/2x11 sheet of CS.
You will use the box #2 die without the top and the top note 3 times. You have to make the height of the 2 top note pieces on the left at least the same as the height of the box height.


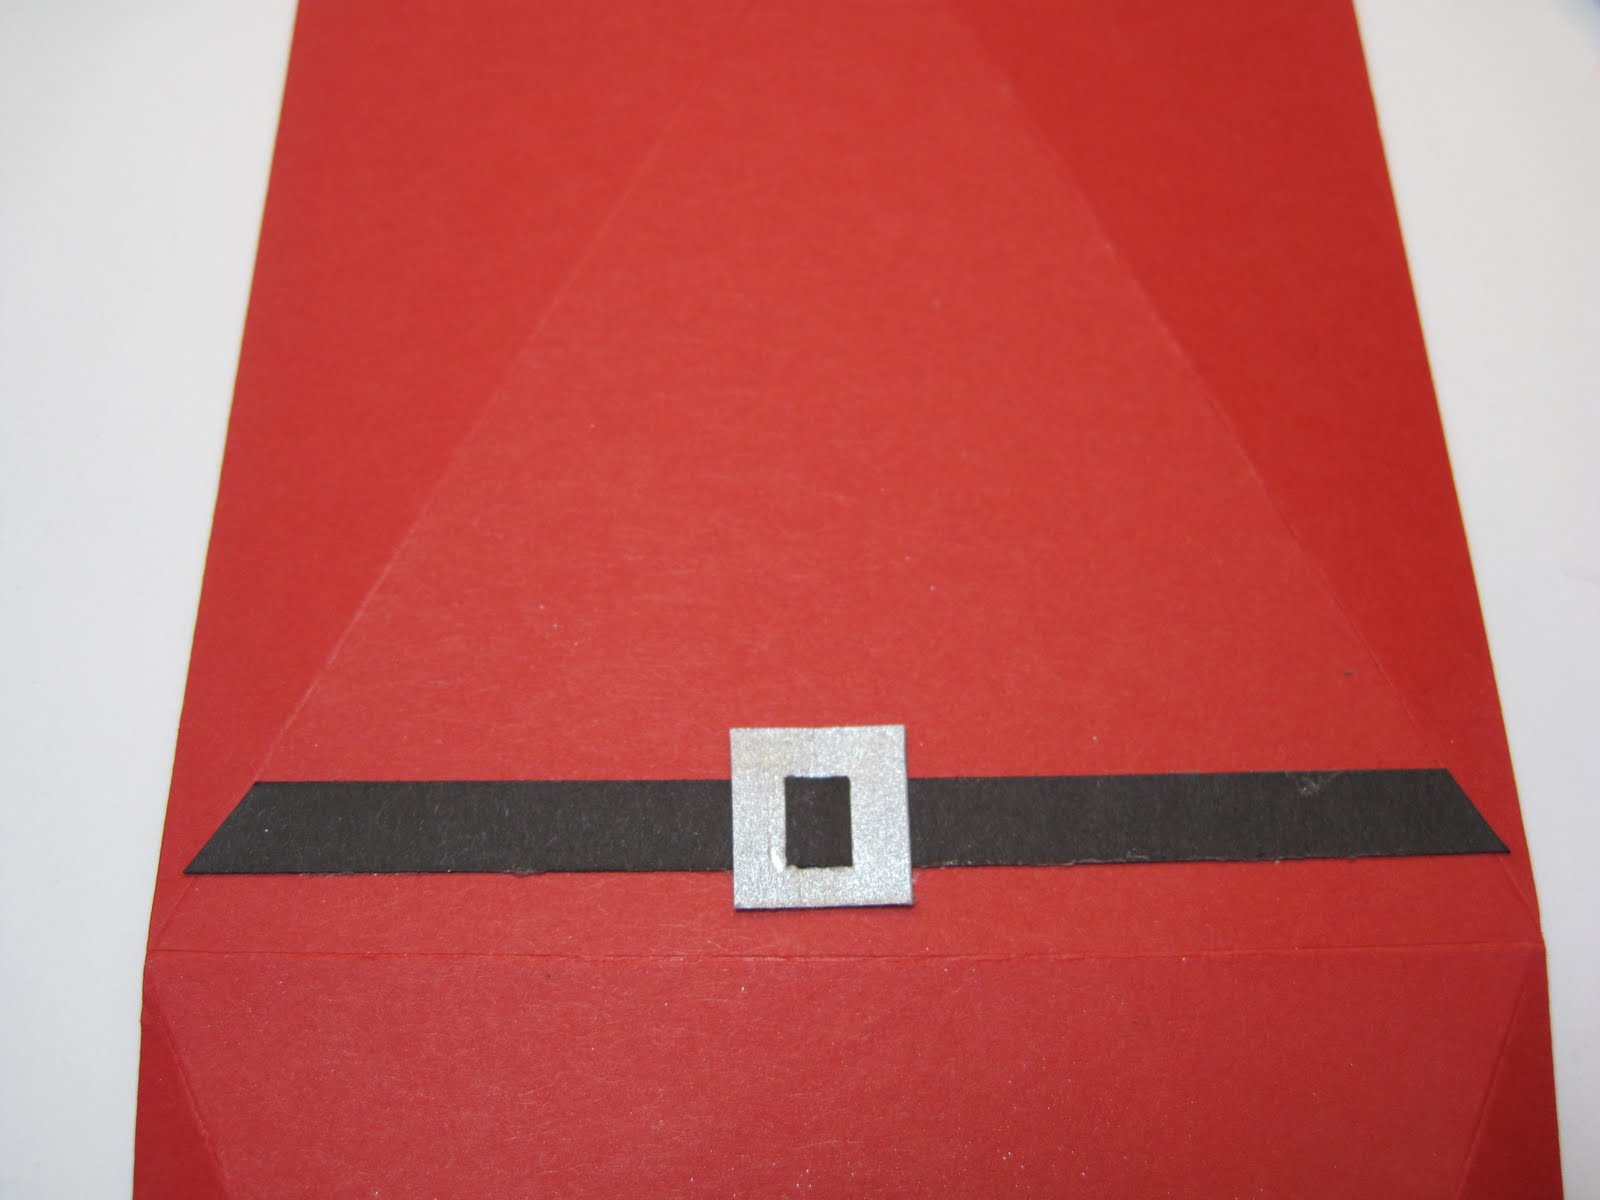
Score the sides of the box as shown to help form the clutch shape and form the box.


Use the versamark inkpad to rub the cardstock all over then sprinkle clear embossing folder over the whold thing as shown on top.
Use some tool- popsicle stick, end of a chopstick, scoring tool, bone folder to make some irregular lines to mimic the crocodile texture.
Whatever loose embossing powder should be THROWN AWAY as it has versamark attached to it. Do not put it back in your clean embossing powder.


Heat the whole thing with your heat gun and watch the faux crocodile texture appear. So COOL!


Fold the Complete Top note piece in half after scoring in half to make the top of the clutch. Attach a decorative brad to accent. A large crystal brad would be pretty too.


Put sticky tape on the back and the front of the box and attach the 2 partial topnote diecut pieces


You should have something like this.
Punch a 1/8 inch hole on the side of the box and tie a ribbon loop around to make the handle putting the knot on the inside.
Attach the back of the top to the back of the clutch using sticky tape. Place a velcro closure (both pieces) behind the brad attachment and close the purse to get the right placement for the velcro.


Here is your final piece. So cute and so easy!
It fits some hershey's kisses, cash, pair of earrings, even a gift card, whatever you wish to bestow on your recepient. You can also just use it as an ornament. What girl would not want one of these hanging from a tree with something special inside......


Just 25 more days to Christmas.
Lynda


Sunday, November 29, 2009

Just Beclause- November swap from Marisa


Is this the coolest card or what? This is a swap from the ever talented Marisa H. -Janet's sister and what a dynamic duo they make!

It's made with the Just Beclause set from the current mini and I love all the details on the card. You can find Marisa's gallery under "mh1016" on Splitcoast here: http://www.splitcoaststampers.com/gallery/showgallery.php?cat=500&ppuser=33619
She has really adorable punched animals- leave her some love on the comments.


She used a basic small grommet hardware to accent the date in silver which adds sparkle.


This is the front base of the easel card she made and the card is propped up behind the little circles that are mounted on dimensionals.


And this is how it looks from the side. She makes really classic, clean and balanced cards that I adore.
I will be sending out easel cards for my holiday greeting this year so I better get cracking!
Count down to Christmas: 26 days!
Lynda


Saturday, November 28, 2009

Season of Simple Grace Diorama


I grew up practically living in church, sang in the choir, played piano during the services-(I am so nervous playing for the public that I was not asked unless they were really desperate!) , even taught Sunday school. And even though I have not been to a local church for a very long time, I still love the hymns and try to read to my children stories from the bible and try to instill in my kids the values that I have learned over the years.
I saw Season of Simple Grace set and it just spoke to me and I wanted to make a nativity scene but did not get around to it until just recently.


In case you are not familiar with diorama cards I will outline it here.
Cut out a half circle using a circle cutter on the front of the card and then cut a slit on the back around the same distance up from the bottom as the bottom of the circle in the front. Here it is up about an inch from the bottom of the card. This is where you will slide in the top of the circle to form the base of the "stage"


I stamped and cut out the images of the kings, shepherd and Christ's family and cut the bottom long with an angle to slide into slits cut on the stage and cut the base in half as shown so that it could be taped going opposite directions so that they would stand up better. I cut the kings separately and cut out extra sheep so I could place the figures in front and back of the center figures.


Cut a slit on the stage where you want the figures to sit and then slide the bottom into the slit.


Then tape the bottom to the bottom of the stage, splitting the base as shown.
Just keep adding the figures until you get an image you find pleasing.
This would be great with snow scene with trees in the background and a deer in the front or snowmen, or little girls boys sitting on the stage, a car/truck in a snow scene, gosh my mind races with all the things you can do with this.


Here is the finished card. I stamped the star in the front and heat embossed it with silver EP. The front panel was stamped with woodgrain stamp (SU background stamp). The sentiment from the same set was stamped with chocolate chip ink onto creamy caramel and attached to the base with brass brads. I tried using some fancy hardware to attach the sentiment but simple won out at the end. I used spica pens in gold for the halo around Mary and Joseph and glitter around baby Jesus but hard to see it here.
27 days until Christmas!
Lynda


Friday, November 27, 2009

Stocking Giftcard holder


Splitcoast Stampers website has challenges every week and for some reason I've never participated. But with pressures of time, I am finding that it is difficult to be original all the time. Sharing ideas and using it as a springboard for your own ideas is great fun. So I have resolved to participate more on the challenges which I hope will keep my creative juices flowing.
So here is my version of the TLC248 challenge to make a gift card holder using a stocking shape template. The top of the card flips opens to reveal the gift card inside. The template can be found here at: http://www.splitcoaststampers.com/forums/showthread.php?t=469369
I used whisper white for base and top layer of the stocking. I stamped the snowman from Simple Seasonal Thanks and colored him in with red and bashful blue and pumpkin marker. Put tombow glue on the rim of the hat and put Martha's course glitter. I cut out the tips of the sarf overlapping the toe using the Hobby Blade and attached Christmas Cocoa specialty paper to the top and the toe tip. I stamped the gloves from Merry (retired from SU) with real red craft and heat embossed it with clear EP and stamped joy from the same set onto the heel patch piece in white -edge sponged with bashful blue- and glued it on the stocking.
Happy Black Friday- only 28 days to Christmas!
Lynda

Ornament Punch Leaf Lines card

I have idled away happily many an hour visiting many friends' blogs.
One of my favorite blogs to visit is Sandi MacIver's. This is one of her cases and have to tell you that when I first saw this stamp set Leaf Lines in the SU catalogue I thought ho hum but after I saw her card I had to have it.
Real red CS is embossed using the finial press embossing folder. I layered it with a old olive cardstock then whisper white. I stamped whisper white CS with the holly from Leaf Lines and sentiment from All Holidays image using old olive stamp and used the blender pen to color in the leaves and real red marker for the berries.
I wrapped double stitched red grosgrain ribbon around the red cardstock and used the "legs" of the brad to gather the ribbon and poke a hole in the cardstock to set the brad.
The whole thing is mounted on a whisper white cardstock folded the long way (to hide the brad/ribbon back and to have a white surface to write on inside). The ornament is punched out of real red CS then embossed the holly image in gold. I used bleach in a aqua painter to paint in the leaves to bleach out some red color (otherwise the leaves look muddy with the green color on the red CS) then colored it in with olive and red marker. Mount the ornament punch accent using a dimensional. This is so far my favorite card using this punch!
Counting down to Christmas....29 days!
Lynda

Thursday, November 26, 2009

Happy Thanksgiving!


Happy Turkey Day!
The other day I wanted to do a craft with my kids and we decided to make some punch turkeys that I saw that I thought was so adorable here by Pam Strobel at http://strobelstudios.blogspot.com/2009/11/bug-eyed-turkey-place-card.html
Thought you may enjoy it too.
It uses
2 -scallop circles punch in close to cocoa-front body and back -( need a butt to cover up all the messy feathers if free standing)
1- 1" circle piece in chocolate chip for face
2- 1/2 " circles for whites of eyes
1-1/2" circle in creamy caramel cut in half for the eyelids
2-1/4" circles in black for the eyes
1- boho blossom flower in pumpkin for the beak
1-boho blossom flower cut as shown for the red thing hanging by the beak- what is that called?
bunch of 5 petal flower punched in mustard, pumpkin, chocolate chip, dusty durango and really rust for the feathers - I cut it so I can get more feathers out of it but you can just stick it on without cutting if you want.
1- snowflake punched in chocolate chip for the feet.

We had so much fun with it - the kids liked it that they were running around with it free standing making gobbling noises.
You could hang a sign on its neck that says "eat beef", put it on top of a menu or stick it on a folded cardstock to make a cute place card as Pam did.
You could also stick a small round peppermint patty between the bodies to make a Thanksgiving treat- after dinner or otherwise.


This was Dylan, my 5 year old's version- - "this is a mad turkey because we're gonna eat 'im!" he says....
I love the expression on his eyelids.
I have a lot to be thankful for, a great husband, healthy kids and family, a steady job that I love, good friends to share my work and obsessions.....
Happy Thanksgiving to you all and your families!
Lynda

Tuesday, November 24, 2009

Easy gift cards


I wanted to show you some simple cards I make using the Pun Fun and Puns from the Past as quick note. Since the images are small, it will fit into a 2x3 folded card that fits in a scallop envelop that you die cut, a prepurchased mini notecards with envelopes that I bought as part of the kit (pg 208 in the 2009-2010 IBC ). or cards that I just made by folding cardstock (in Bliss Blue). I scored the edges of the front of the card on the grateful card using the scorer. Envelopes stamped with heart image from More the Merrier (level 3 hostess) .
Make a bunch and keep it in a stash to give away for the people who are alway so nice! and Thank you for visiting my blog- I love hearing from you all!

Lynda :-)

Monday, November 23, 2009

November Swap from Janet


There are people that you meet and see a facet of them and then you learn more about them and realize what a gem that person is and make you want to get to know more about that person.

Janet Pulskamp is one of them. When I was invited to joint the local stamping group my friend Diedre said -" there is a doctor in the group!"' and then I saw that it was Janet whom I have met through local women's medical group but never realized what a talent she has. She always has such clean styling and balance, you can recognize instantly that it has the "Janet touch".

I received this swap at the last stamp n chat and she's given me permission to post it here for you all- and you know that I will be casing this totally for one of my stamping workshops- Actually, you can't say case if you are not changing anything, can you?.(lol)... all right I will be replicating it! (as a Star Trek fan would say...)

Love the color scheme! Love love love the slit punch detail at the top! This is one of my favorite sets from the mini Wandering Words and hope to be using it for my own valentine cards so thank you Janet for another beautiful card idea!

Lynda

Sunday, November 22, 2009

Stampin' Up front row regionals- samples


I love going to Stampin' Up Convention and regionals held in various places around the US.
Last year for the Oakland, CA regionals, I met some terrific people on this trip which was unfortunately fraught with misadventure. First, I was so excited about it and could not sleep and then I- who NEVER oversleep- woke to a start to a phone call wondering where I was- so I dashed like mad after what I think is the shortest shower on record, to get out of the house to get there since I was supposed to be the driver!

Then on the way back home, we were rear ended by a speeding car that hit the car behind me in a slow moving traffic so had to stop to take statements and get the car checked out. My car was really no worse for wear, just a tap really but what a day it had been!

Out of all this I have met the most wonderful group of really talented demonstrators that share my passion for papercrafts and we try to get together monthly and it is the highlight of my month.

Stampin' Up this year did something called 'front row regionals' where they videotaped a regional meeting and you watched it at home- you buy the kits and do the make and takes and Annette hosted it at her home and it was a total blast and I learned some new tricks and technique which is alway fun.


These were some of the make and takes that we made with the kits we purchased using the make merry set from the mini catalogue and they were really easy to make and totally sweet. And I did not even use my stamp positioner!

I like the thoughtful matching envelope as well.

In case you are asking the ribbon is the back of the red polka dot grosgrain. Same ribbon is used on the next card vertically under the paper strip. So clever.....


Hope you like these samples. There is more, but I have to finish it my way and upload it for you.......

Hope you are enjoying your weekend!

Lynda

Saturday, November 21, 2009

Adventure balloons


Mykids love, I mean LOVE balloons. I've hired a balloon artist every time I have help a birthday party for my kids at home or park where I could do this. I've even learned to do some basic shapes myself. But, yesterday we went to Appleby's on Saratoga Ave near 280 in SanJose and a guy was working there- unfortunately did not get his name but WOW, was he fabulous!


He blew everyone I've met out of the water. He made cinderella and a snow white with an apple in her hand, big giant spiders, supersoakers, I have not seen someone with more repertoire of balloon shapes.


He made this giant spider with yellow eyes with hot wheels fire printed on it and Tyler just loved it and pretended to be attacked by it.


Dylan refused to say what he wanted until Tyler's was completely made and then he says " I want a worm, a black one, all squiggly like this" making a zigzag with his hands. I thought a worm? what is the point of that? just one long balloon! but look what he did with his request!


Dylan put him to sleep on one of his blankets last night with a pillow under his head- saying "good night, Wormie" and gave him a kiss.

It was so sweet.


Kyle asked for " a propodile, a breen one- A DARK breen one " he says. and this is what he made him.

I saw him go around the room and make some amazing shapes and things. I did not get his name but did get his card. They have a web site at http://www.adventureballoons.net/

Dale thought maybe Tyler will be too old for this on his next birthday but I beg to differ. If you could see how much he loved his balloon spider, you would know too. I will certainly be using them for my next birthday party.

Lynda

Friday, November 20, 2009

Scenic scene Mirror Image tecnique


When I saw this stampset Scenic scene I knew I wanted to make a mirror image card.
The technique has been updated somewhat from how I originally learned and it is so much easier I thought I would share it with you.
I separated the image from the word so that I could use the stamps separately as shown here.
You can go hog wild with the background but I wanted to keep it simple for this one.

First ink the stamp using artichoke pad then use versamark pen to blot the ink off the bird then color in with real red marker. Then stamp the image onto the glossy cardstock right side up where you want the image.


Do the same thing but this time stamp onto a large enough window sheet or some clear smooth clear surface.


Flip the image upside down with the (inked side to the cardstock) to mirror the original stamped image and the rub the window sheet to transfer the ink onto the cardstock.


This is how it should look. The mirror image will not be as solid but that is EXACTLY what you want.


I think a horizon line is helpful to define the spaces so I used a scrap piece of cardstock to mask the water line and used a dauber to apply some navy ink to create a horizon line.


This is sort of how it should look.


I sponged some bordering blue onto the water first to darken the mirror image horizontally to create a softer image.
then I sponged the right side up image from the edge to to soften the edges as well. After I do all the sponging then I stamp the image ( so the sentiment has no chance of smudging)


Voila, the final card- and it really took less than 2 minutes.

Happy Stamping!
Lynda


Thursday, November 19, 2009

Santa triangle box- my version


This is a santa triangle box cased from Samantha Parisi from http://rubberstampingdiva.com/?p=235 last year. I tweaked it a bit as always and I thought it turned out really sweet.
If you have to make a bunch, you can use a 12x12 and cut it as shown to get 4 - 4x8 pieces to make 4. you can also use 8 1/2x 11 cardstock and cut it 4 1/4 x 8 1/2 to get 2 out of each and either will look fine.


Score the box in half parellel to the short sides as shown.

Make a little score mark at the top and the bottom of the short sides at 2" (for 4" box) to find the center.


Then score it diagonally from the center score point to the center score line as shown and do it 4 times all around.


You should have something that looks like this.


I stamped Merry Christmas from All Holidays stampset for an extra message and embossed it with silver embossing powder.


These are the punch pieces you need. I did not want to make any templates for the mustach so I used the 5 petal flower punch from SU. The face is 1 3/8 in circle and nose is 1/2 inch circle punched in blush blossom. Punch scallop circle, and word window punch and 5 side flower in white CS and 1/2 inch square silver brushed CS. Belt is 1/4 inch strip black CS.


I textured the word window and scallop circle with finial press texture embossing folder from SU to add extra texture.
You can also add some glue and glitter too if you wish to add extra sparkle.
I dauber'd some pretty in pink to make blush and edged the nose to make it stand out.
Cut the 5 sided flower as shown to get the mustach. ( only the center one is used here)
The belt buckle is punched with hand held punch from Fiskars to make the slits- double rectangle would also work well (adjust size to fit the punch) or just cut it out with blade.


Arrange the face as shown- you will need to chop santa's face where it sticks out above the hat brim.


The belt is added and the edge overhanging is trimmed to fit.


I used sticky strip to lay everything down but the eyes I think is easier to place with multi mono. I put little dots where I want the eyes.


Then I use tweezers to put the little 1/8 inch circle punched onto the glue.


No eye would be complete without a little sparkle to add some life. I used the white gel pen here.


Fold over the box and punch a hole on the side for the handle.


Open that side and punch the other side.


You can tape the sides shut and you can still have a little hole you can squeeze to open or if you are using a ribbon, use a bead to keep the box closed ( it needs to be a snug fitting bead though- if you choose this option)


Here is a box finished in the 4 1/4 inch version- it is really cute either way!
Happy Brrrr Day!
It's 42 degrees here this morning!


Lynda