Thursday, June 19, 2014

Sea Street Hello


   Love this little Octopus.  The base card is crumbcake with a layer of whisper white stamped with images in  Hello Honey and Lost Lagoon.  The sentiment is from Just Sayin' - I cut out the inside word to use separately from the word bubble.  After you stamp all the images then run it through the Decorative Dots EF to add eht bubble like texture. 

I then punched a piece of whisper white and stamped the Octopus with Lost Laggon and sponged the edges to make it pop a bit.  Layered Soft Sky diecut with a  circle framelit to accent and mounted with dimensionals.

Added a strip of DSP from Moonlight paperpak  that looked most appropriate (you can get 6 pieces from one sheet if you cut it where the color changes.)

 I stamped the flags and used the stay put ribbon technique to tied the baker's twine in place, then threaded it through the stamped and punched scallop circle piece pierced with the paper piercer (threaded the baker's twine using a floss threader- it's tight but I like how it looks.)

Tuesday, June 17, 2014

Envelope punch board box CASE


 Is this not the cutest thing ever?
This was a case of a box I got from my upline Tami.   We made this at my Stampin' Party this month.  We used 2013-2015 In color DSP cut into quarters to 6x6 pieces of squares.

We used the Envelope punch board punched and scored at 2" and 4" on all 4 sides as shown and then use the scoring tool to score the flaps at 3" down to the base of the cards then fold up the sides to make the box as shown below.
 Tape or glue down the flaps if you wish.  This is what it looks like on the inside.
 The top is made using the Starburst framelit using the Silver Foil sheets and the circle i using the Strawberry Slush CS with 1 3/4 inch circle punch.  The sentiment from Num-Num stampset is inked with the Basic Gray inkpad and diecut with the Word Bubbles Framelit.  It fit perfectly!
 Added a little color with Strawberry Slush marker and a rhinestone jewel over the i and mounted with dimensionals for a sweet little treat.


This is the original box I cased for one of my projects this month- super cute!

Sunday, June 15, 2014

Something for Baby Father's Day Card


 When I saw the dies that came with Something for Baby set I envisioned this card with the man's shirt made with the baby onesie die.  It's perfect for a father's day card or any man's card- Hawaiian print or any print will work.  I originally made this shirt with a white CS and my DH said it looks collegiate/ preppie so I changed it to Smoky Slate to make it more manly.  The base card is Smoky slate with a piece of Night of Navy embossed with Stylish Stripes EF.  Another piece of Smoky Slate with a Blackberry Bliss on top.   The tie is diecut using the Moonlight paper stack. Actually I wanted the
stripe pattern for the tie and the DSP is how I chose the colors the card turned out. 


This is the template for the shirt.  I first cut the waist as shown then used paper snips to cut straight up the sides of the crotch to make the pocket ( it's the perfect width! and I like the slight curve on the bottom)  then folded the paper in half to make symmetrical collars from the curves of the leg ( the collar is a bit too tight for a man's shirt but the curves of the legs are really perfect).
 This is how it goes.  The collar on the right is from the piece cut from the left side of the leg (I put them side by side so you could see where it came from).
I stamped the image from Label Something set using Blackberry Bliss and punched it out with Modern label punch.  The Happy Father's day is from Teeny Tiny Wishes using Night of Navy inkpad. 

It would be really cute with a small Rhinestone jewel as a tie tack, too.

Time to Play!
Enjoy...
Lynda

Tuesday, June 3, 2014

Graduation 2014 PopUp Card variation

Take the same card from yesterday and leave out the second score line to keep the bottom part straight instead of folded over and this is what you get. The message is front and center.  I think I like the pop up better for reasons I will share later- but a variation nevertheless.


Monday, June 2, 2014

Graduation Pop Up Spring card


My nephew is graduating from high school this year and I wanted to make him a pop up graduation hat card but all the cards I saw had a weird dimension to it that would not fit in an A2 card so I had to reverse engineer a card to make it so.  I knew it had to be 4 1/4" across and that made the dimension 9 1/2" in the length.  That meant I could get 2 cards out of each sheet of cardstock which works out even better.

Because the cards are 4 1/4" across, use the diagonal scoring board and score with the card held in the tall direction at 2 1/8" which is the
half way point as shown in the first picture, then flip over and score again.  Then turn the card 90 degrees so the long side across the top and score again at 2 1/4 then flip it over and do it again.  There should be a diamond at the edge.
Now I switched the scoring plate to the regular scoring plate turn the card over and score between the scored X- at 5 1/2" mark (the diamond will be on the right side).  Make another score line down at 3 1/4 line where the diagonal line on the left ends.
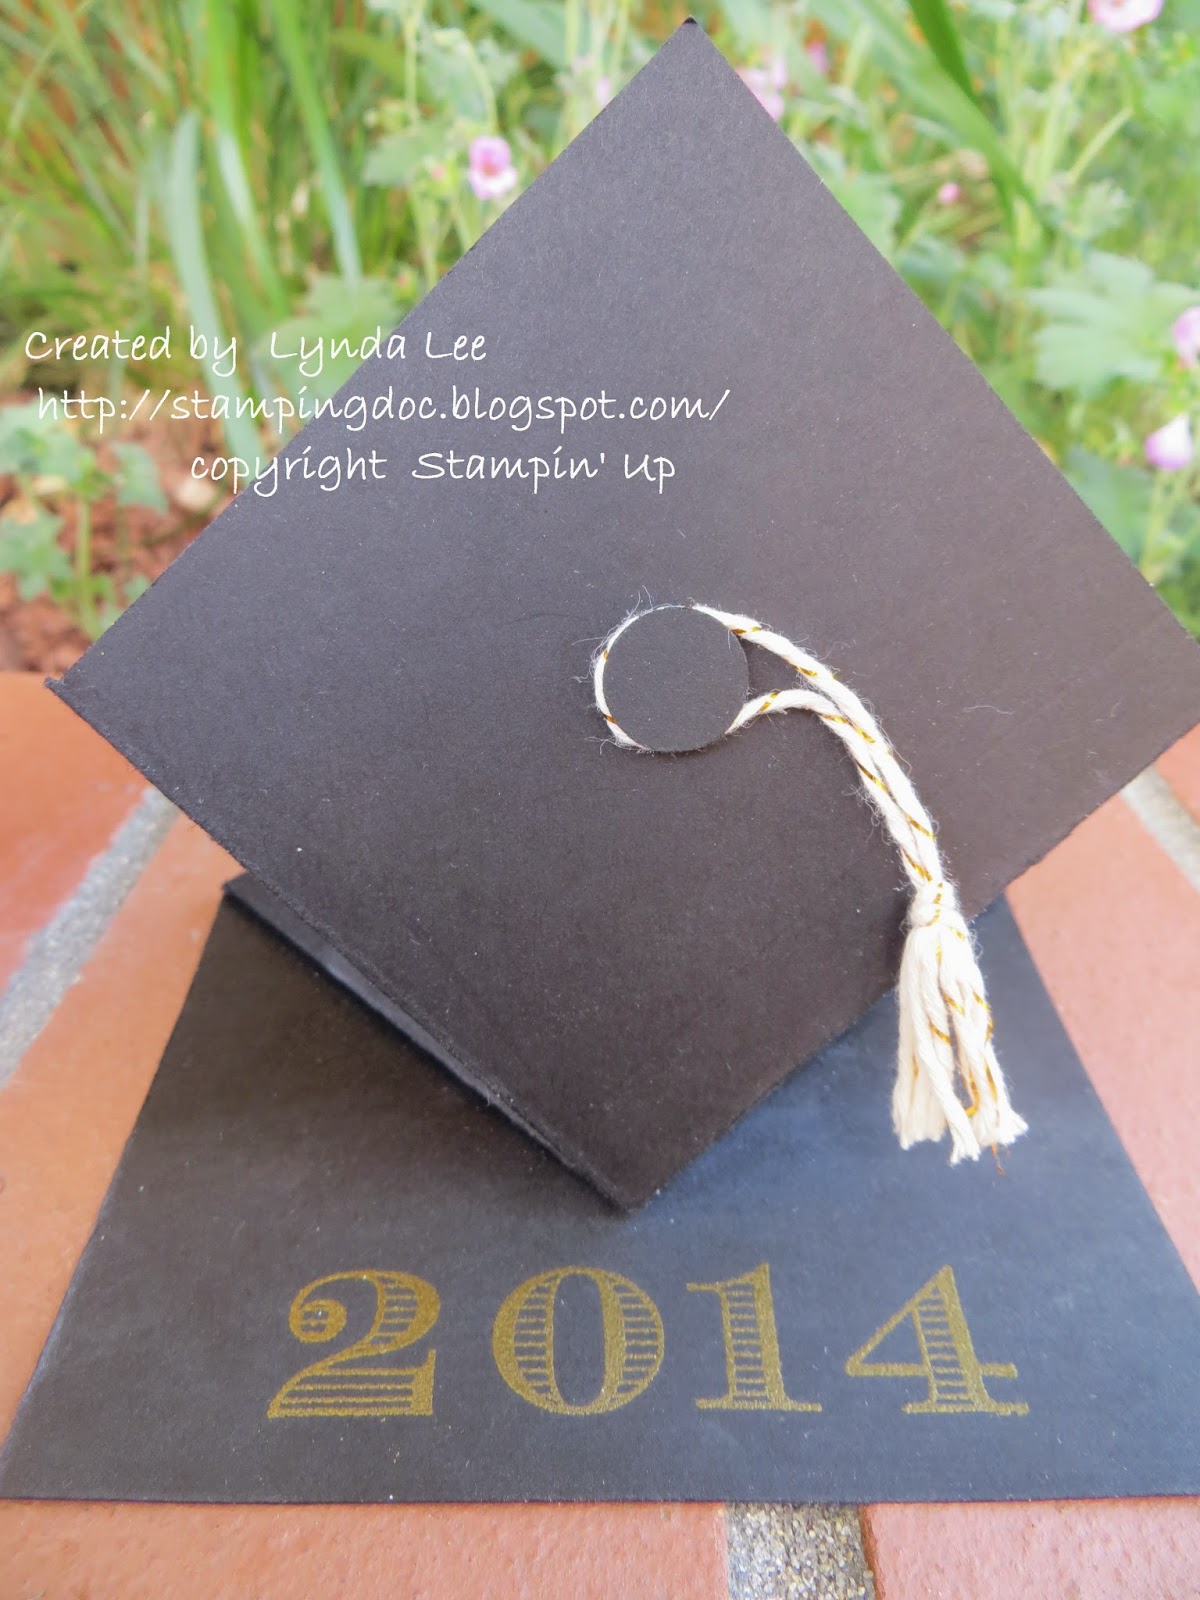
Cut off the triangles from the corner of the diamonds, fold the score lines and you have an easy pop up card.  I used 2 3/4" white CS squares to stamp the message on the inside.  The sentiment is from the Remembering your birthday set which is perfect for any celebration event. the graduation sentiment is from the Blue Ribbon set stamped with Basic Black and Island Indigo.
2014 is stamped using Memorable moments set with versamark and embossed with gold embossing powder.  I used a 1/2 inch circle punch with a dimensional to make the button for the hat and made the tassel using the gold baker's twine.  I hope he likes it.